
The complete guide
How to Choose and Fit a Drain Hose Extension Kit
The gap nobody plans for
Appliance makers supply a drain hose long enough for a tidy, textbook installation. Real rooms are not tidy. The washer ends up on the far wall because that is where the floor is level. A kitchen gets reworked and the dishwasher slides two feet along the counter. A rental has the standpipe in a spot that made sense to somebody in 1986.
So you end up with a hose pulled taut, held in place by hope and a bit of tension. It is a quiet problem until it is not. A hose under strain tugs at the appliance fitting every time the machine vibrates. Eventually it works loose, or the end hops out of the standpipe during a spin cycle, and you come back to a wet floor.
Adding a metre of proper hose with clamped joints solves it in about ten minutes. That is the whole idea behind a washer drain hose extension kit.
What is actually in a kit
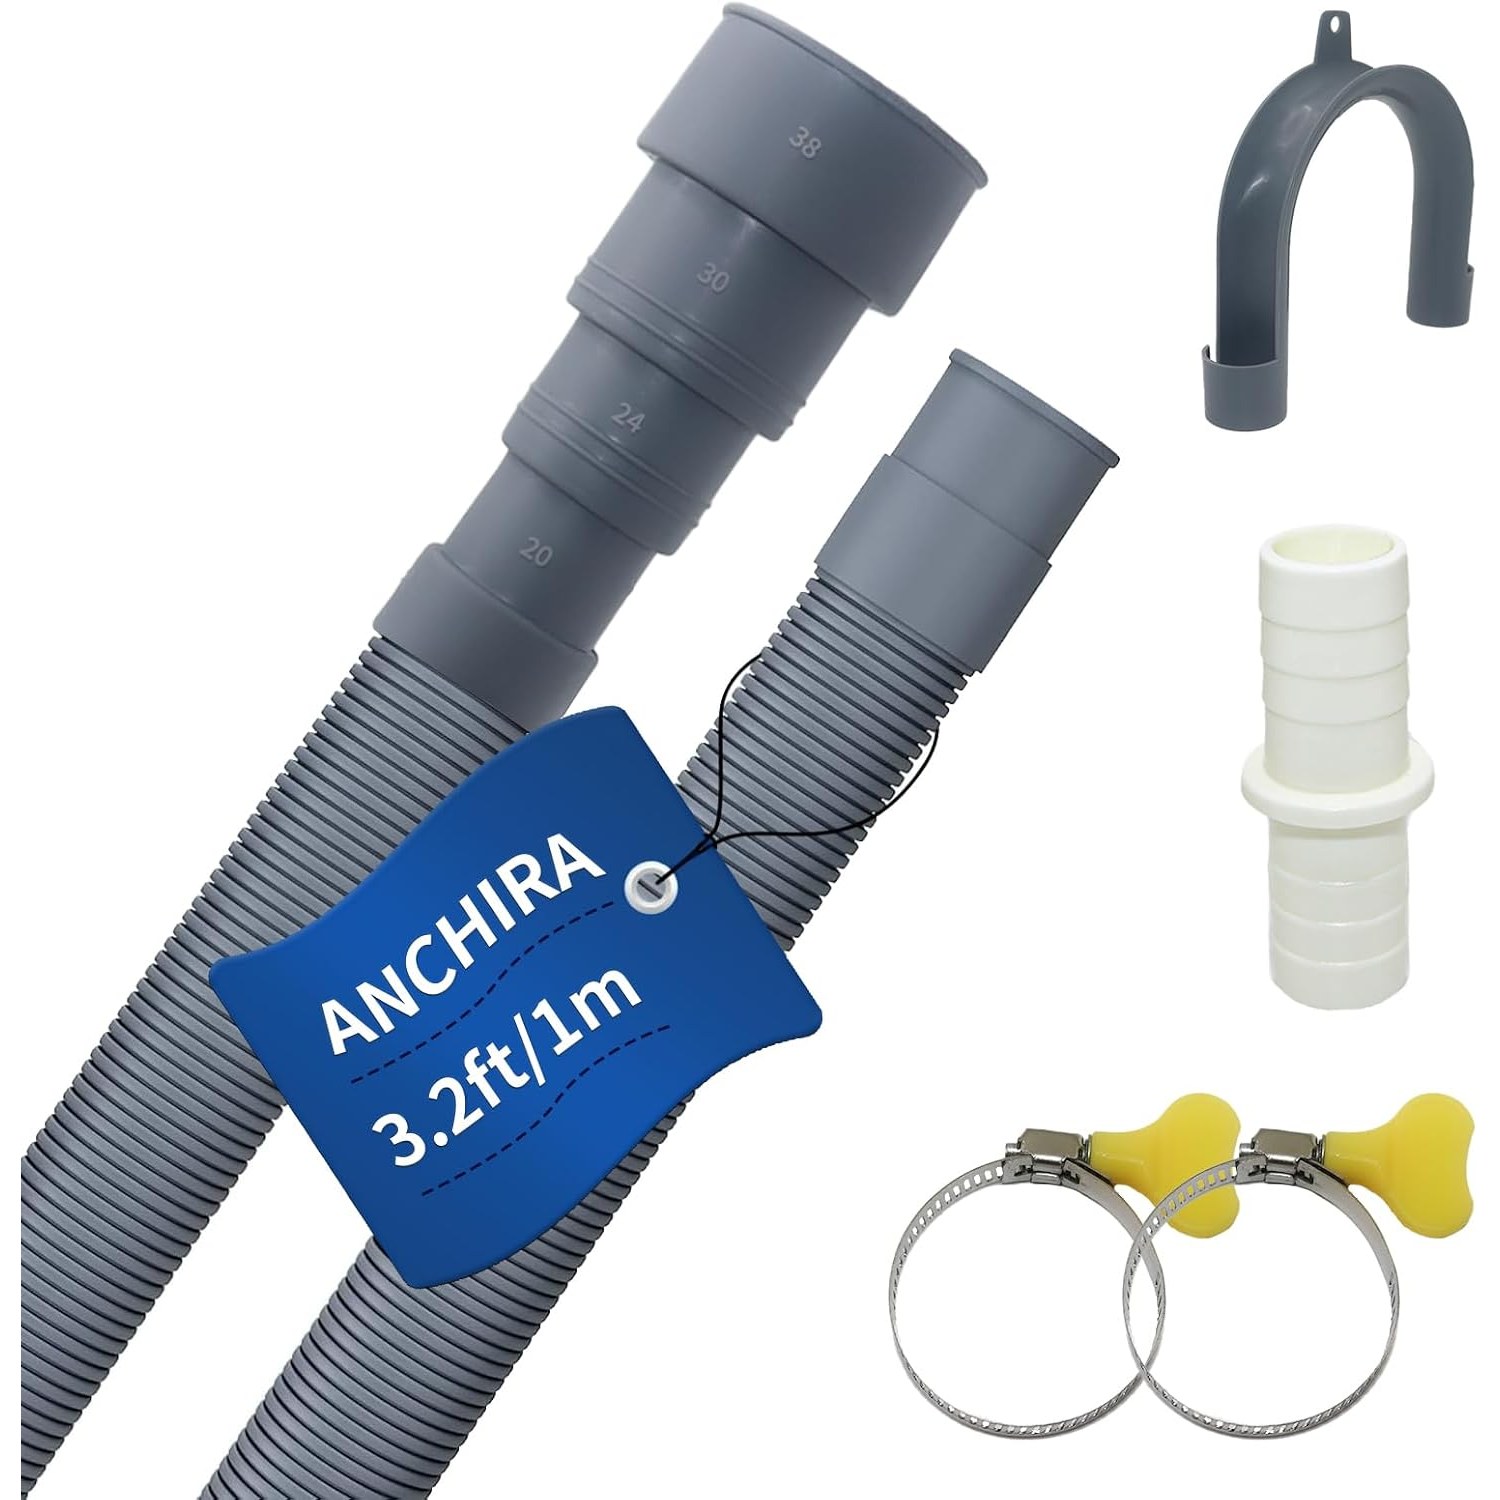
Four parts, each doing one job.
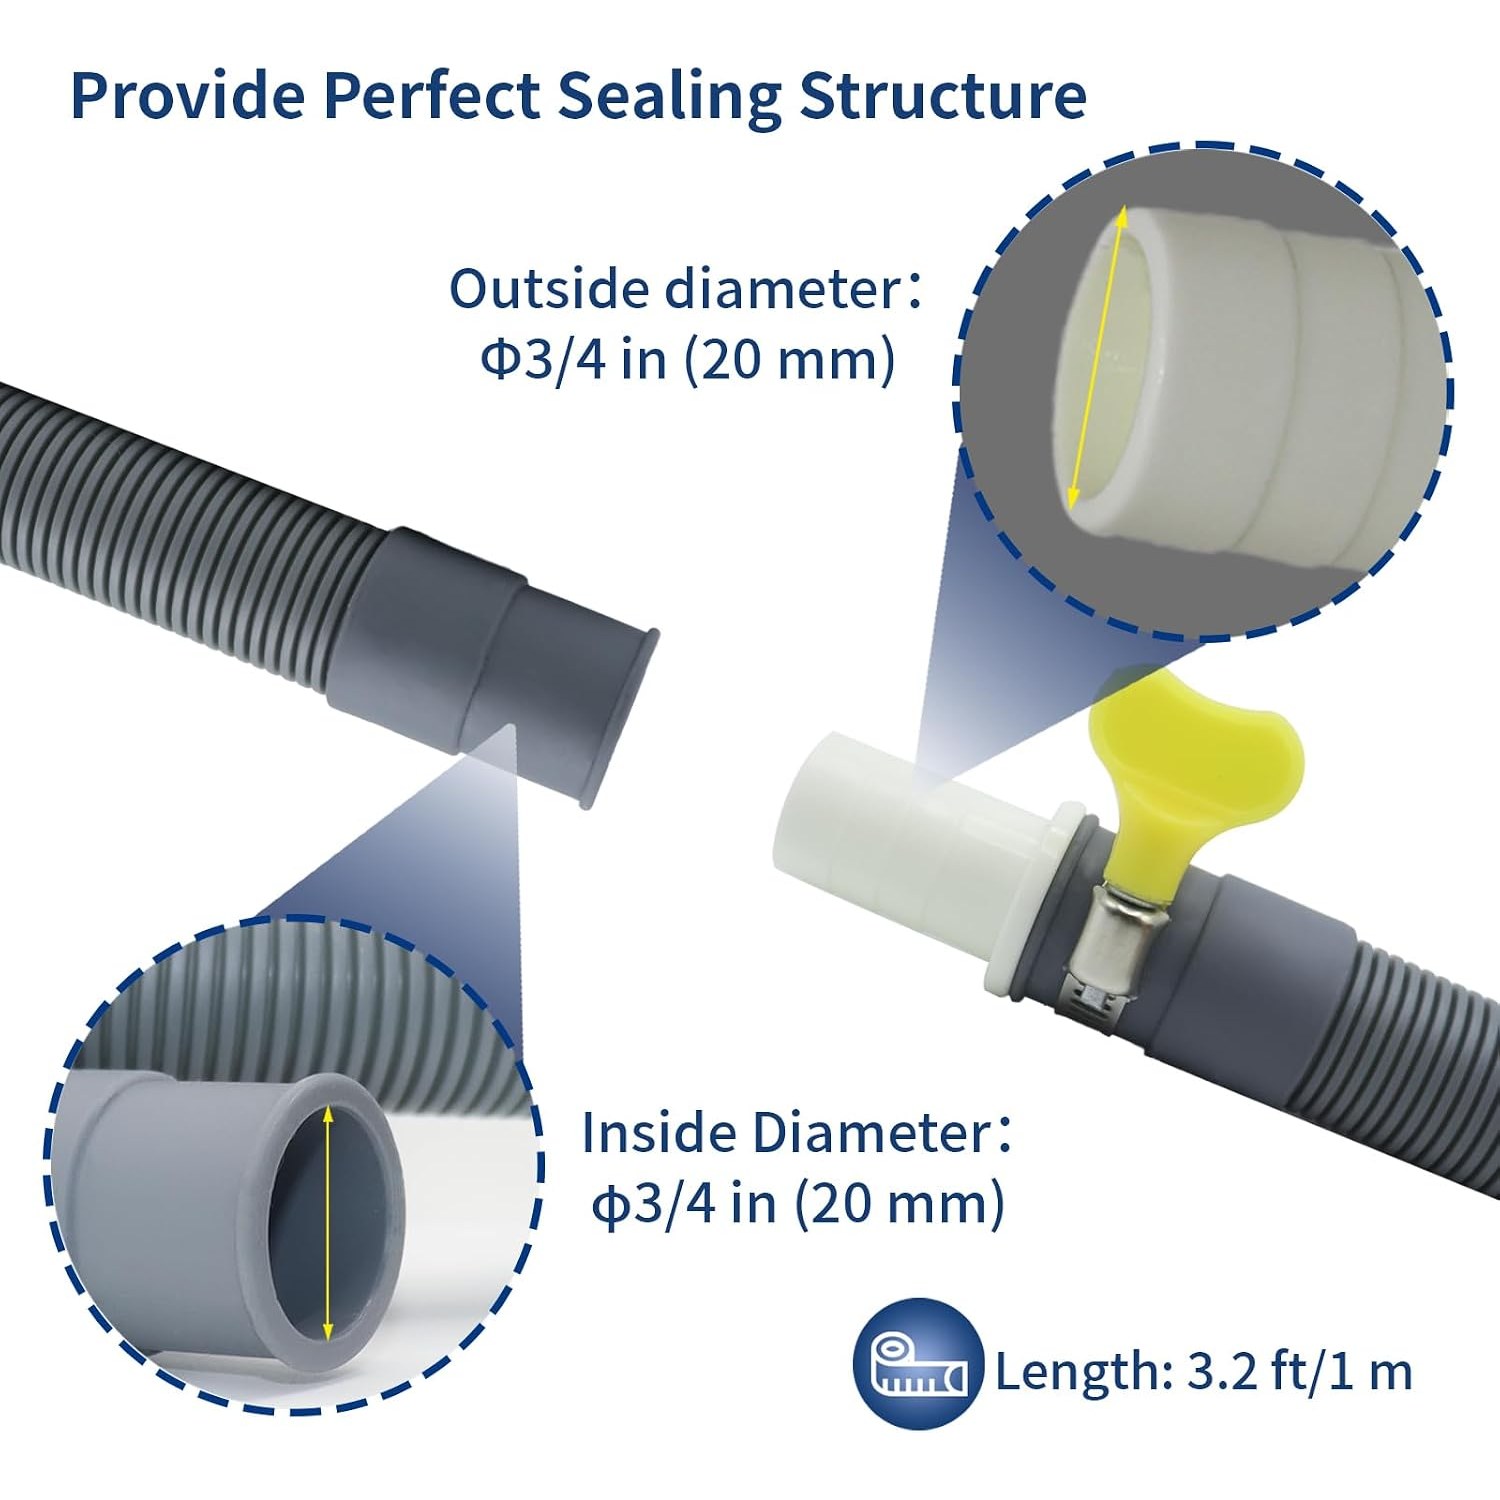
The hose is 3.2 ft, or 1 m, of corrugated polypropylene with an outside diameter of 3/4 in (20 mm) and a nominal wall thickness of 3 mm. Corrugation is the key feature. A smooth-wall tube of this size folds flat the moment you bend it past a certain point, and a flat spot is where water slows and lint collects. Ribbed hose bends and springs back. Squeeze a section in your fist and watch it reopen.
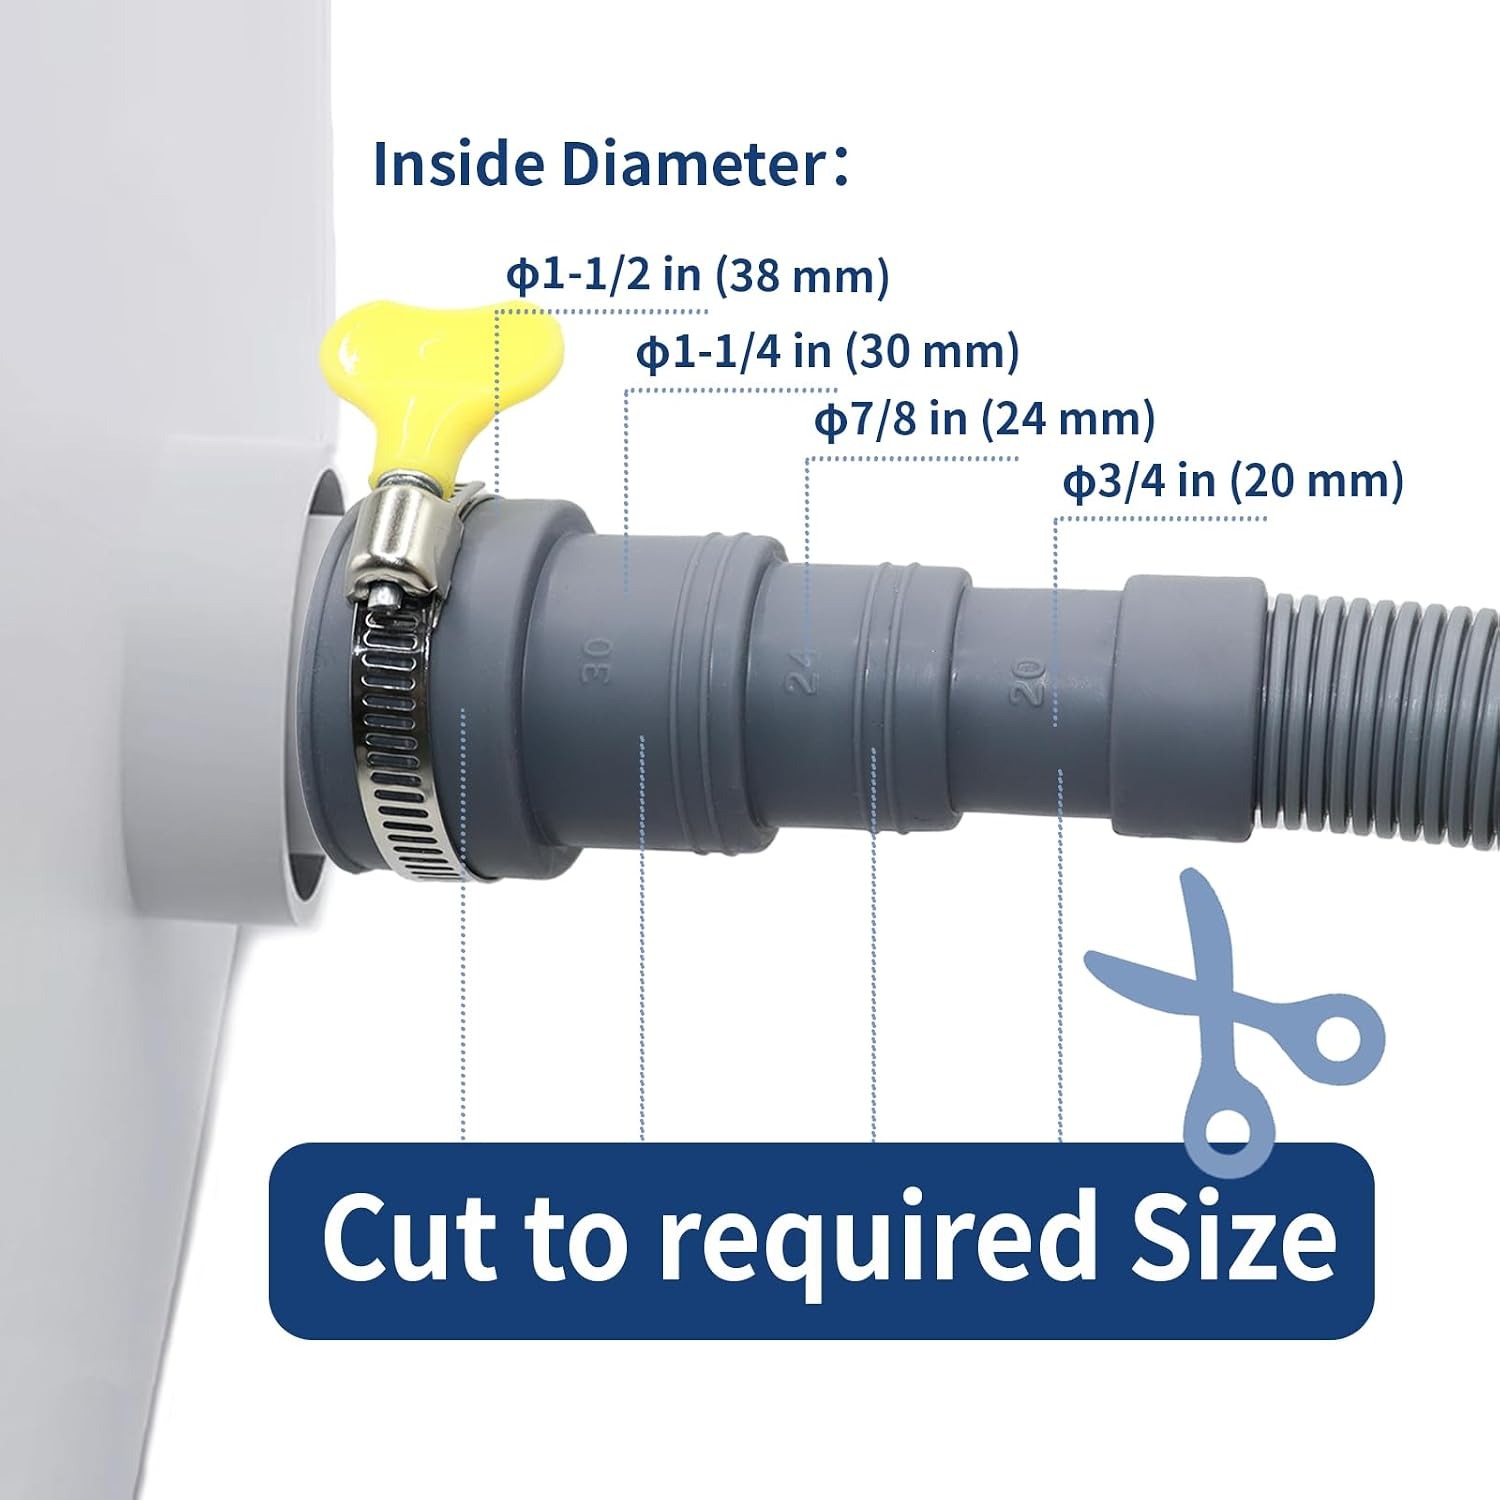
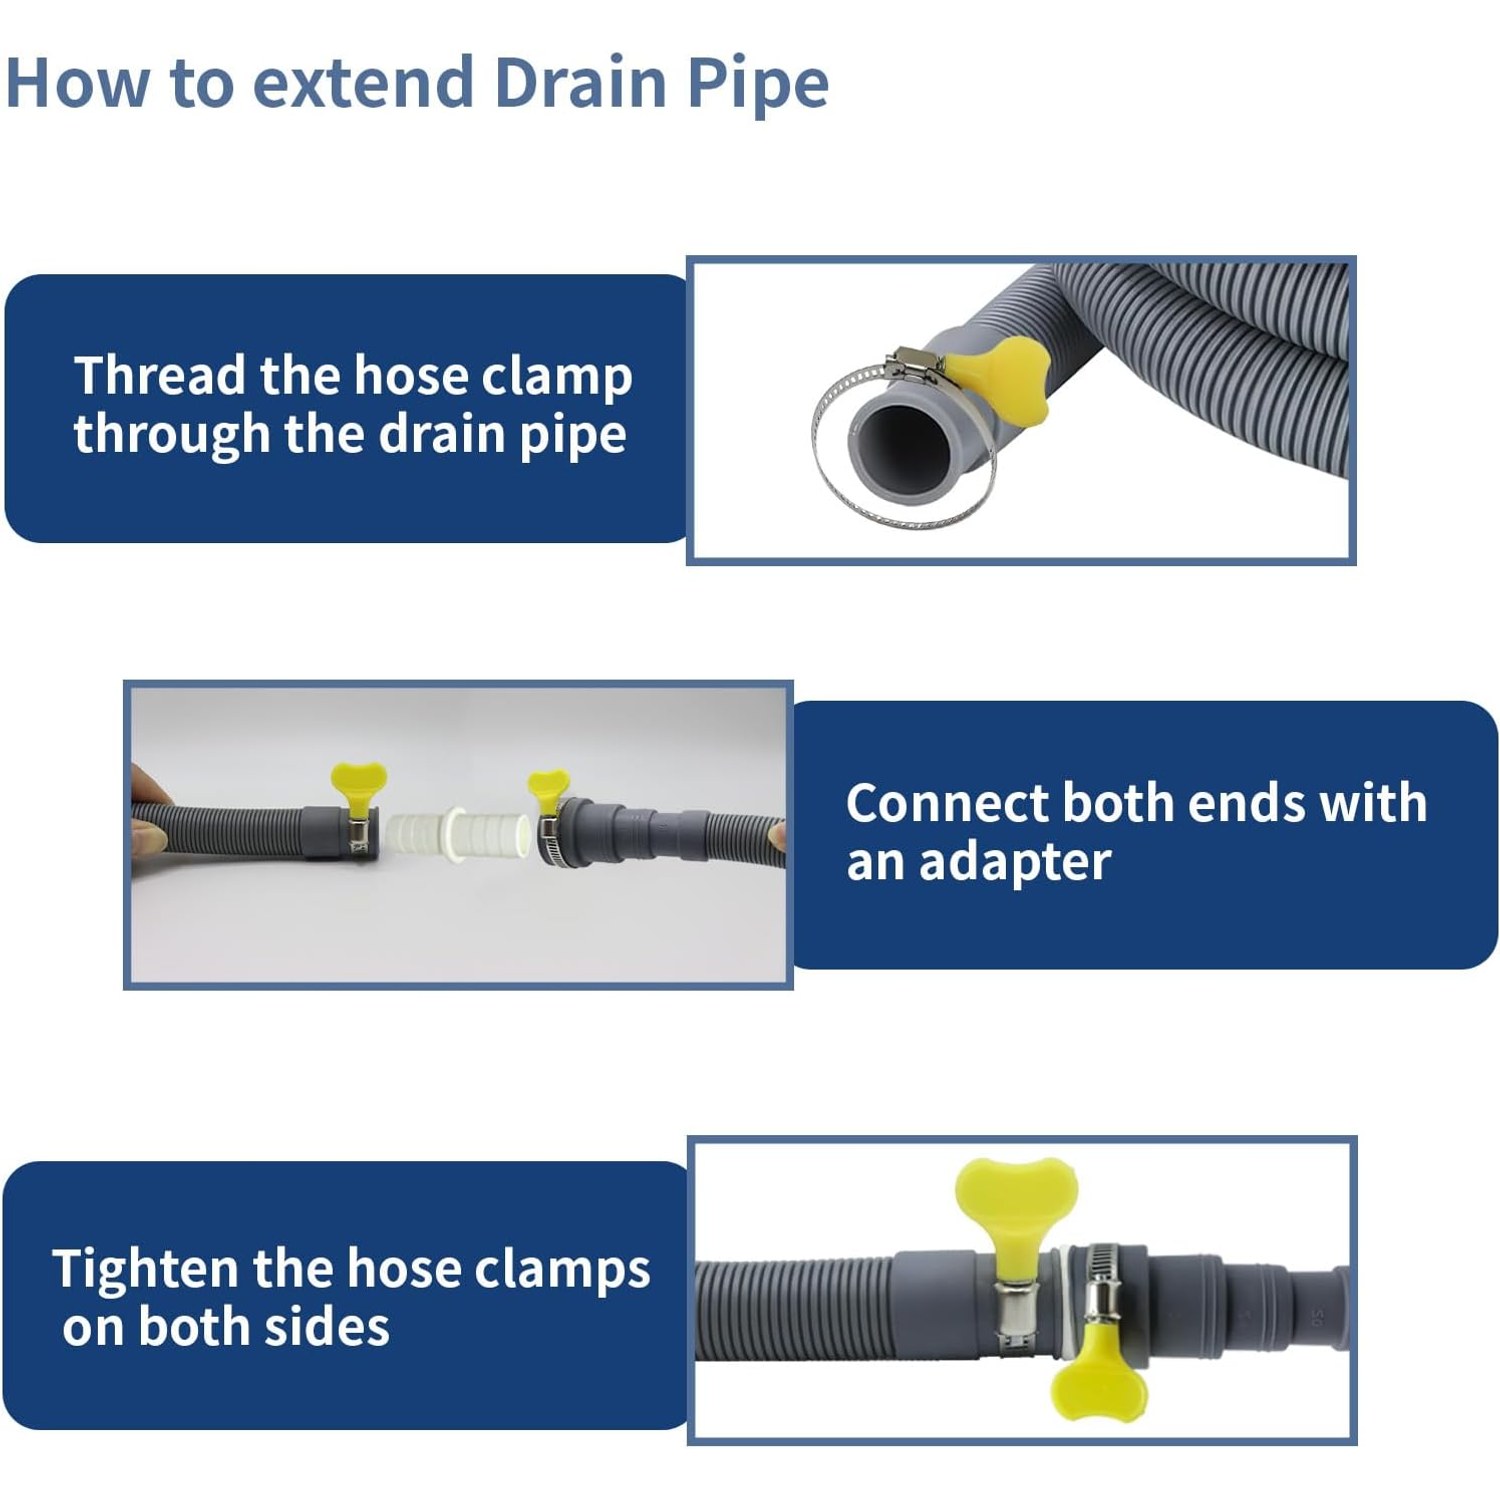
The adapter is a stepped plastic fitting with four inner diameters moulded into it, 3/4 in, 7/8 in, 1-1/4 in and 1-1/2 in. You cut it back to the step that matches your existing hose. Both ends are barbed, which means small ridges that bite into the hose wall and resist being pulled off.
Two stainless steel hose clamps, adjustable from 18 to 38 mm, go over each joint. The barbs hold the hose on. The clamps hold it on properly.
The U-bend holder is a small bracket that fixes the hose into a hook shape near the outlet. It is the part people overlook and then appreciate, because a hose that stays where you put it is a hose that does not flood the room.
Measuring before you order
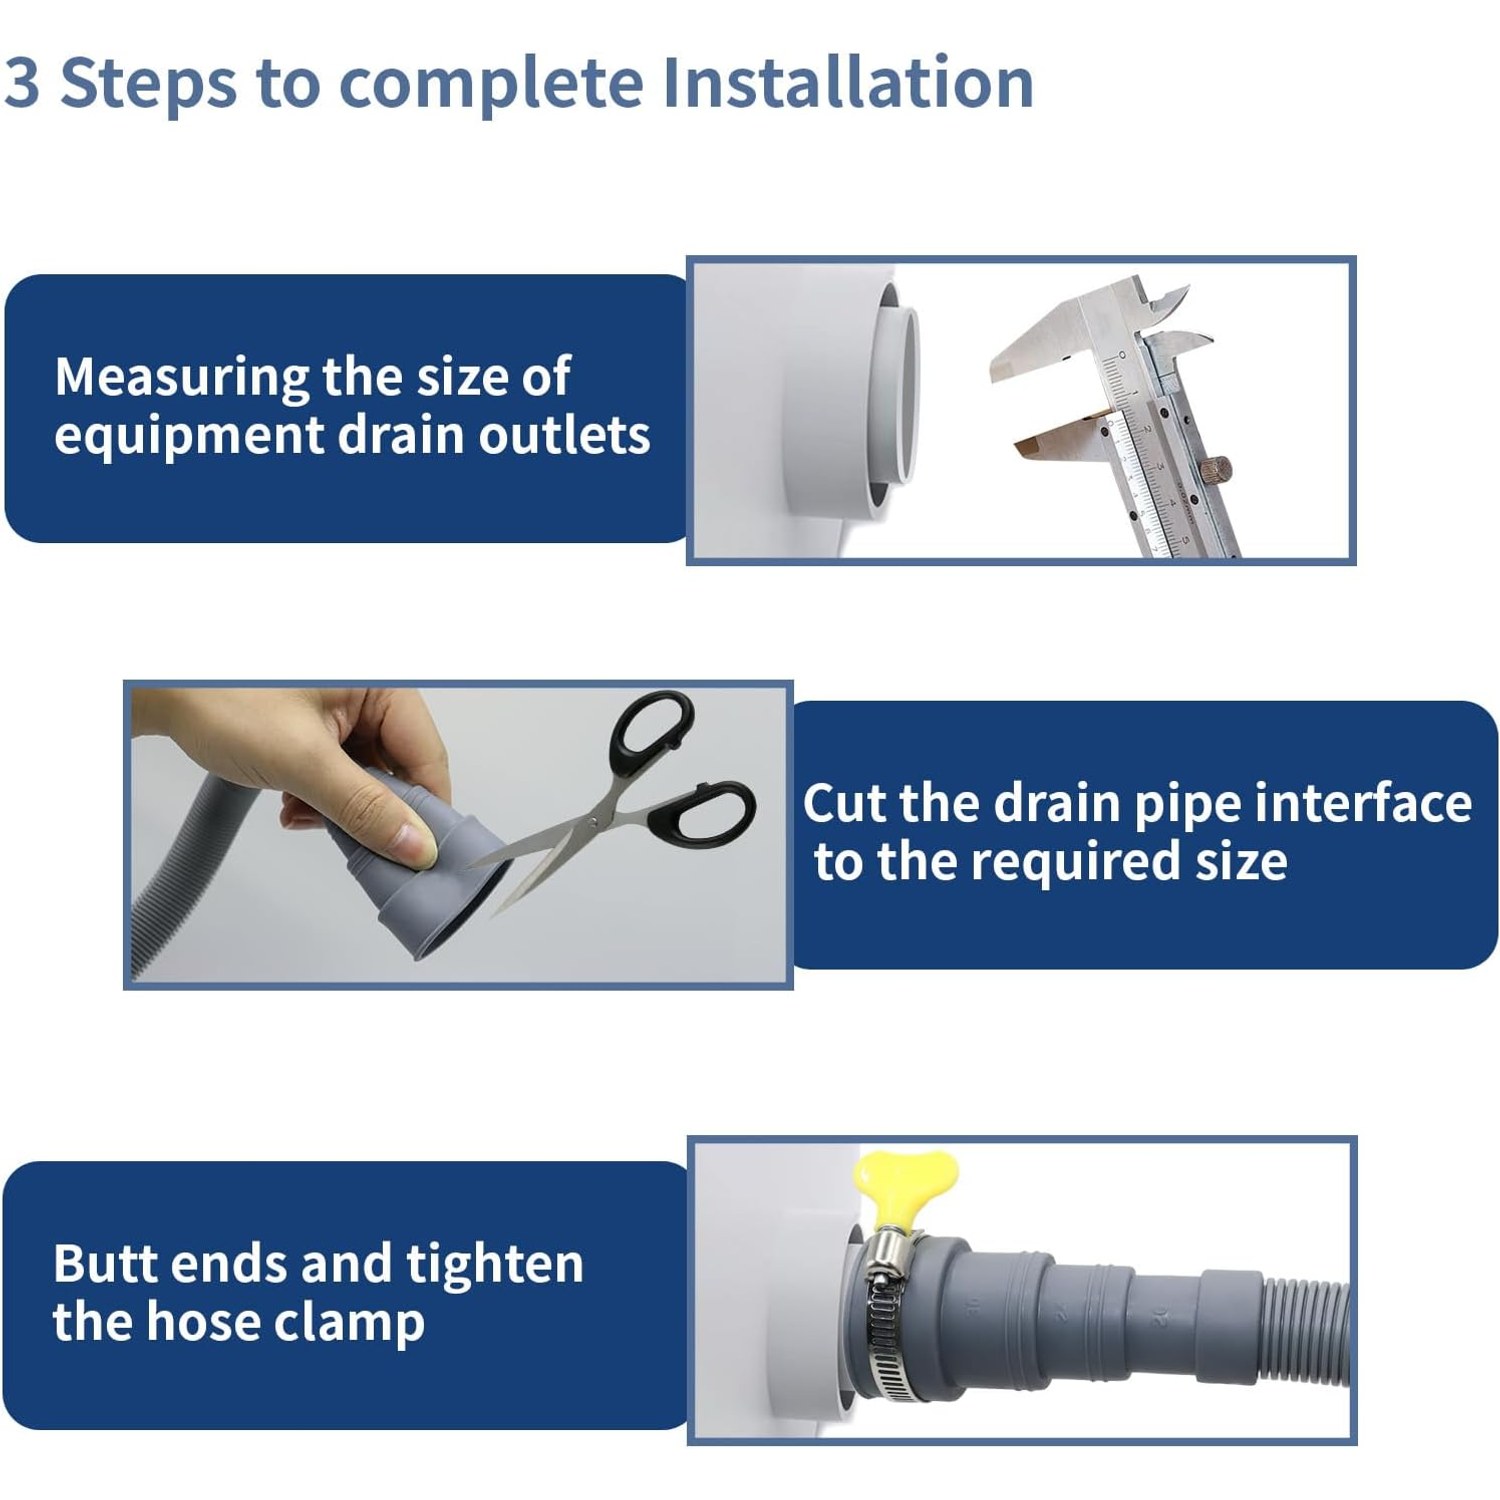
Everything hinges on one number, the inner diameter of your existing hose end. Pull the hose off the standpipe and measure across the opening. Most domestic appliances land between 3/4 in and 1-1/2 in, which is exactly the range the adapter covers.
Write the figure down. When the kit arrives you cut the adapter at that step, and the rest follows. If your measurement falls outside the four sizes, this kit is not your match and you need a different connector.
Also think about total length. Appliance manuals usually state a maximum drain hose length and a maximum discharge height. Pumps are sized for a certain amount of work, and asking one to push water further or higher than specified means slow draining and water flowing back toward the machine. Check the manual, then decide whether one metre of extra hose is enough or whether you really need to move the appliance.
Fitting it, step by step
Unplug the machine and turn off the water before you touch anything. Drag out a towel, because the old hose will hold a cupful of water you did not know about.
Cut the adapter at your chosen step, straight across, using a sharp utility knife or a fine-tooth saw. Take a second to trim any burr off the cut rim. A ragged edge gives water a path to track along, and that is the most common cause of a weepy joint on any flexible drain hose.
Slide a clamp loosely onto each hose before you push the fittings together. Everybody forgets this once. Push the existing hose fully onto one barbed end of the adapter, then the new hose onto the other. Fully means until it stops, not just until it feels snug.
Slide each clamp over the barbed section, centre it, and tighten evenly with a screwdriver or nut driver. Firm, not crushing. If you see the plastic underneath starting to deform, back off a quarter turn.
Clip the U-bend holder near the outlet and hook the end over your standpipe or laundry tub rim at the height you want. Make sure it cannot slip down into standing water, since a submerged outlet can siphon dirty water back toward the machine.
Then run a short cycle. Stand there with a dry paper towel and dab around both joints after the pump has run for a minute. Dry paper shows up moisture instantly, long before a drip would ever reach the floor.
Where it suits, and where it does not
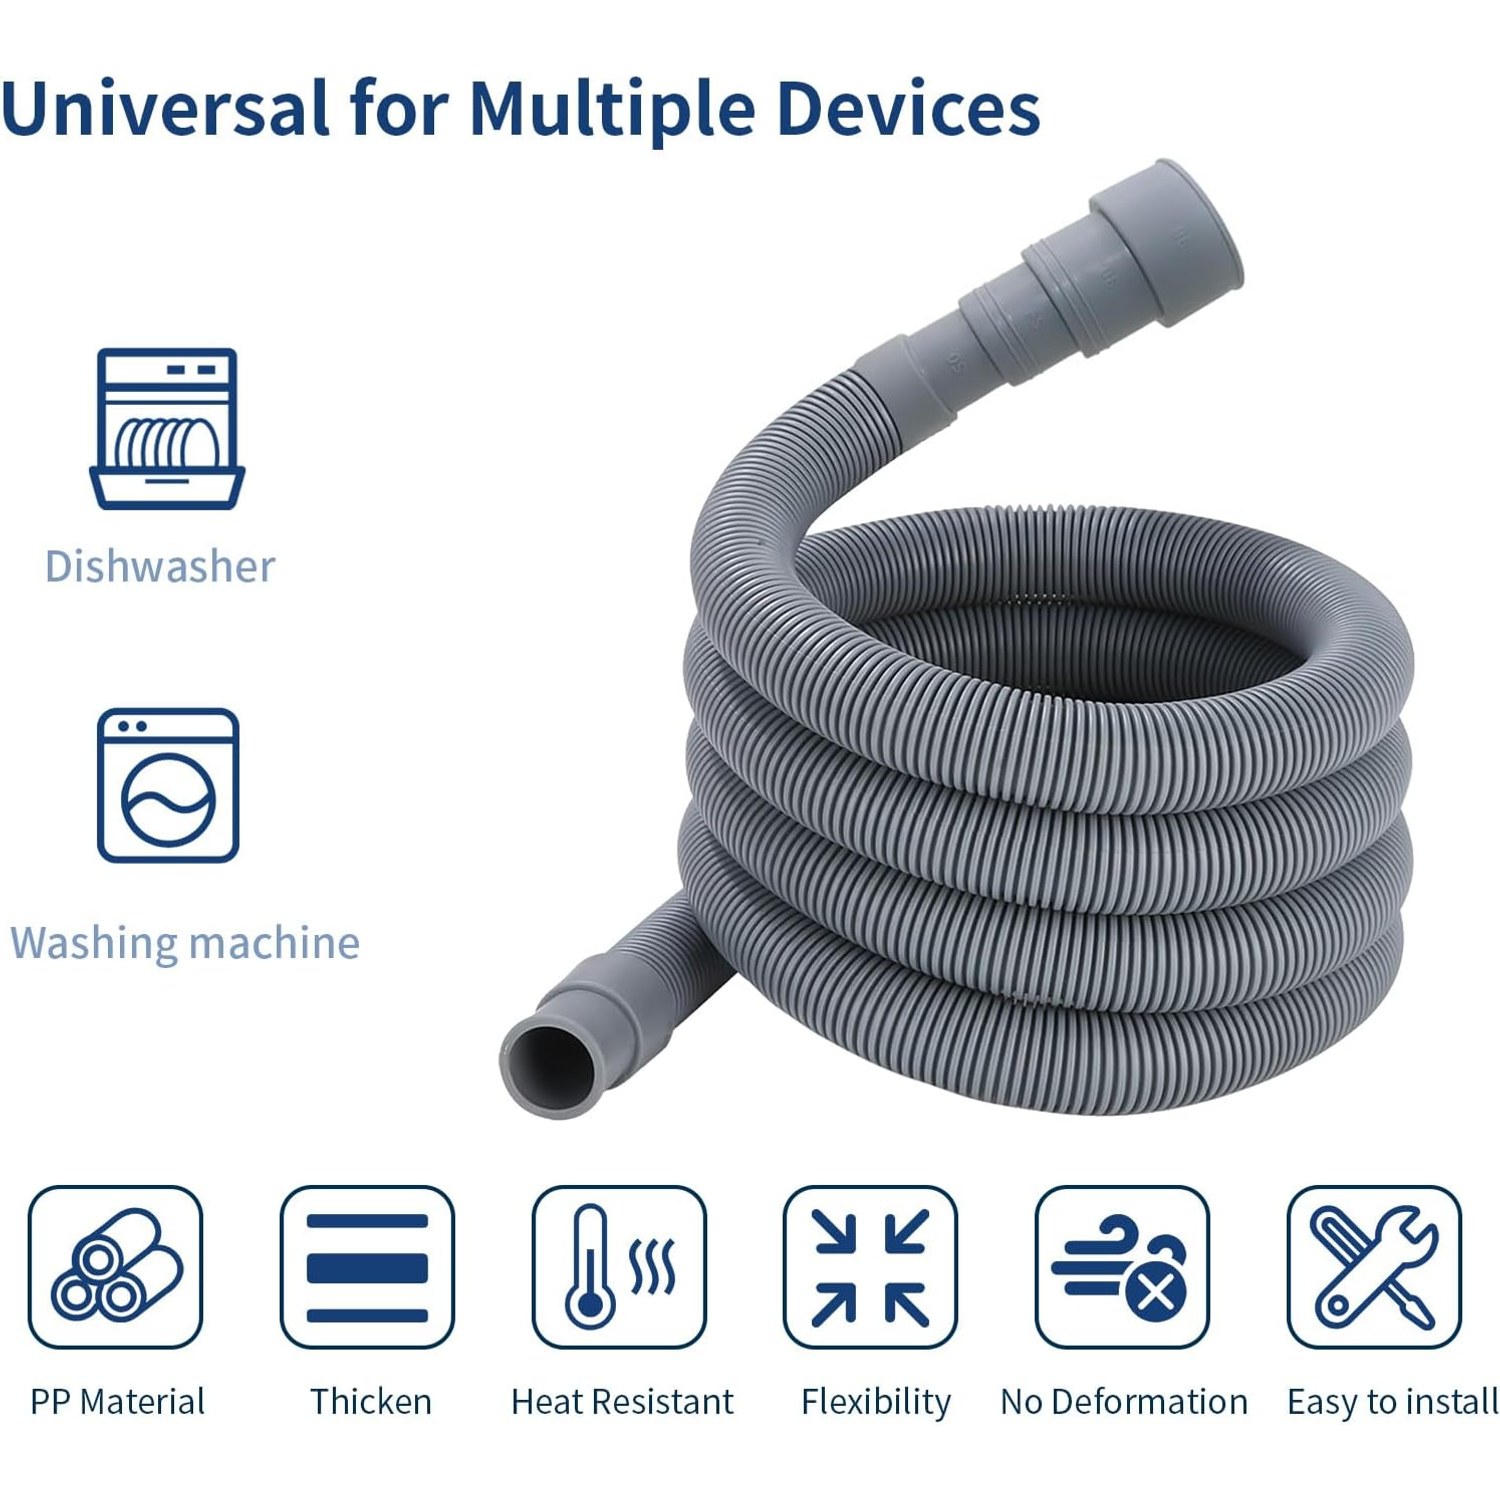
This kit covers washers, dishwashers and the drain line on machines like condenser dryers. The maker lists water temperatures up to 203°F, so hot wash cycles and dishwasher discharge are comfortably within range.
What it is not: a dryer vent duct, and not a substitute for fixed plumbing. If the job involves cutting, moving or connecting pipework in the wall or under the floor, that is a licensed plumber's work. Adding a standpipe or changing a trap is in the same category. A flexible hose extension is a flexible hose extension, nothing more.
It is also not a repair for a hose that has gone brittle. If the original hose has chalky patches, splits, or a section that stays flattened after you squeeze it, replace the hose rather than extending something that is already failing.
Keeping it working
Flush clean water through the hose whenever you disconnect it, so detergent residue and lint do not dry inside. Wipe the outside with a damp cloth and mild dish soap. Store it loosely coiled, not folded flat, and keep it clear of heaters and sharp edges.
Once or twice a year, look at the clamps. Plastic relaxes slightly through heat cycles, and a clamp that was tight in January may need a quarter turn by December. It takes thirty seconds and prevents the kind of slow leak you only find when the cabinet below starts to swell.
Watch for the signs of a hose at the end of its life. Stiffness, chalky white patches, a smell that will not flush out, or a kink that no longer springs open. Hose is cheap. Floors are not.
Choosing between options
If you are weighing up a few kits, three things actually matter.
Wall thickness and corrugation, because that is what stops kinking. A 3 mm nominal wall is reasonable for domestic appliance use.
Adapter range, because a kit with one fixed size only fits one hose. Four stepped sizes between 3/4 in and 1-1/2 in cover most households without you having to measure twice.
Whether clamps are included. Plenty of hoses ship bare, and then you are making a second trip for two small metal bands. Stainless clamps in the 18 to 38 mm range are the right size for this hose and they resists rust in a damp laundry corner.
The U-bend holder is a bonus rather than a requirement, but it is the difference between a hose that stays hooked and one that slides out halfway through a spin.
The short version
Measure your existing hose end first. Cut the adapter to match, push both hoses fully onto the barbs, clamp each joint evenly, and hook the outlet with the U-bend holder at a height your appliance manual allows. Run a test cycle and check the joints with dry paper.
Done properly, it is a ten-minute job that stops a hose being under permanent strain, and that is usually the real cause of the puddle.