
The complete guide
Choosing and Fitting a Washing Machine Drain Hose
The puddle nobody plans for
Almost every laundry flood starts small. A hose that has been folded against a wall for two years finally splits along the crease. A clamp that was never quite tight enough gives up on a long hot cycle. Or the end of the hose, hooked loosely over a sink rim, works itself free while the pump is running and spends three minutes spraying grey water across the floor.
None of that is dramatic while it is happening. You find out afterwards, when a sock is floating past the dryer.
A drain hose is a cheap part doing an important job. It carries every litre your washer pumps out, under pressure, several times a week. It gets squashed when the machine is pushed back, pulled when the machine is dragged out, and heated by whatever cycle you are running. Replacing it before it fails is one of those small jobs that pays for itself the first time it prevents a mess.
What this hose actually is
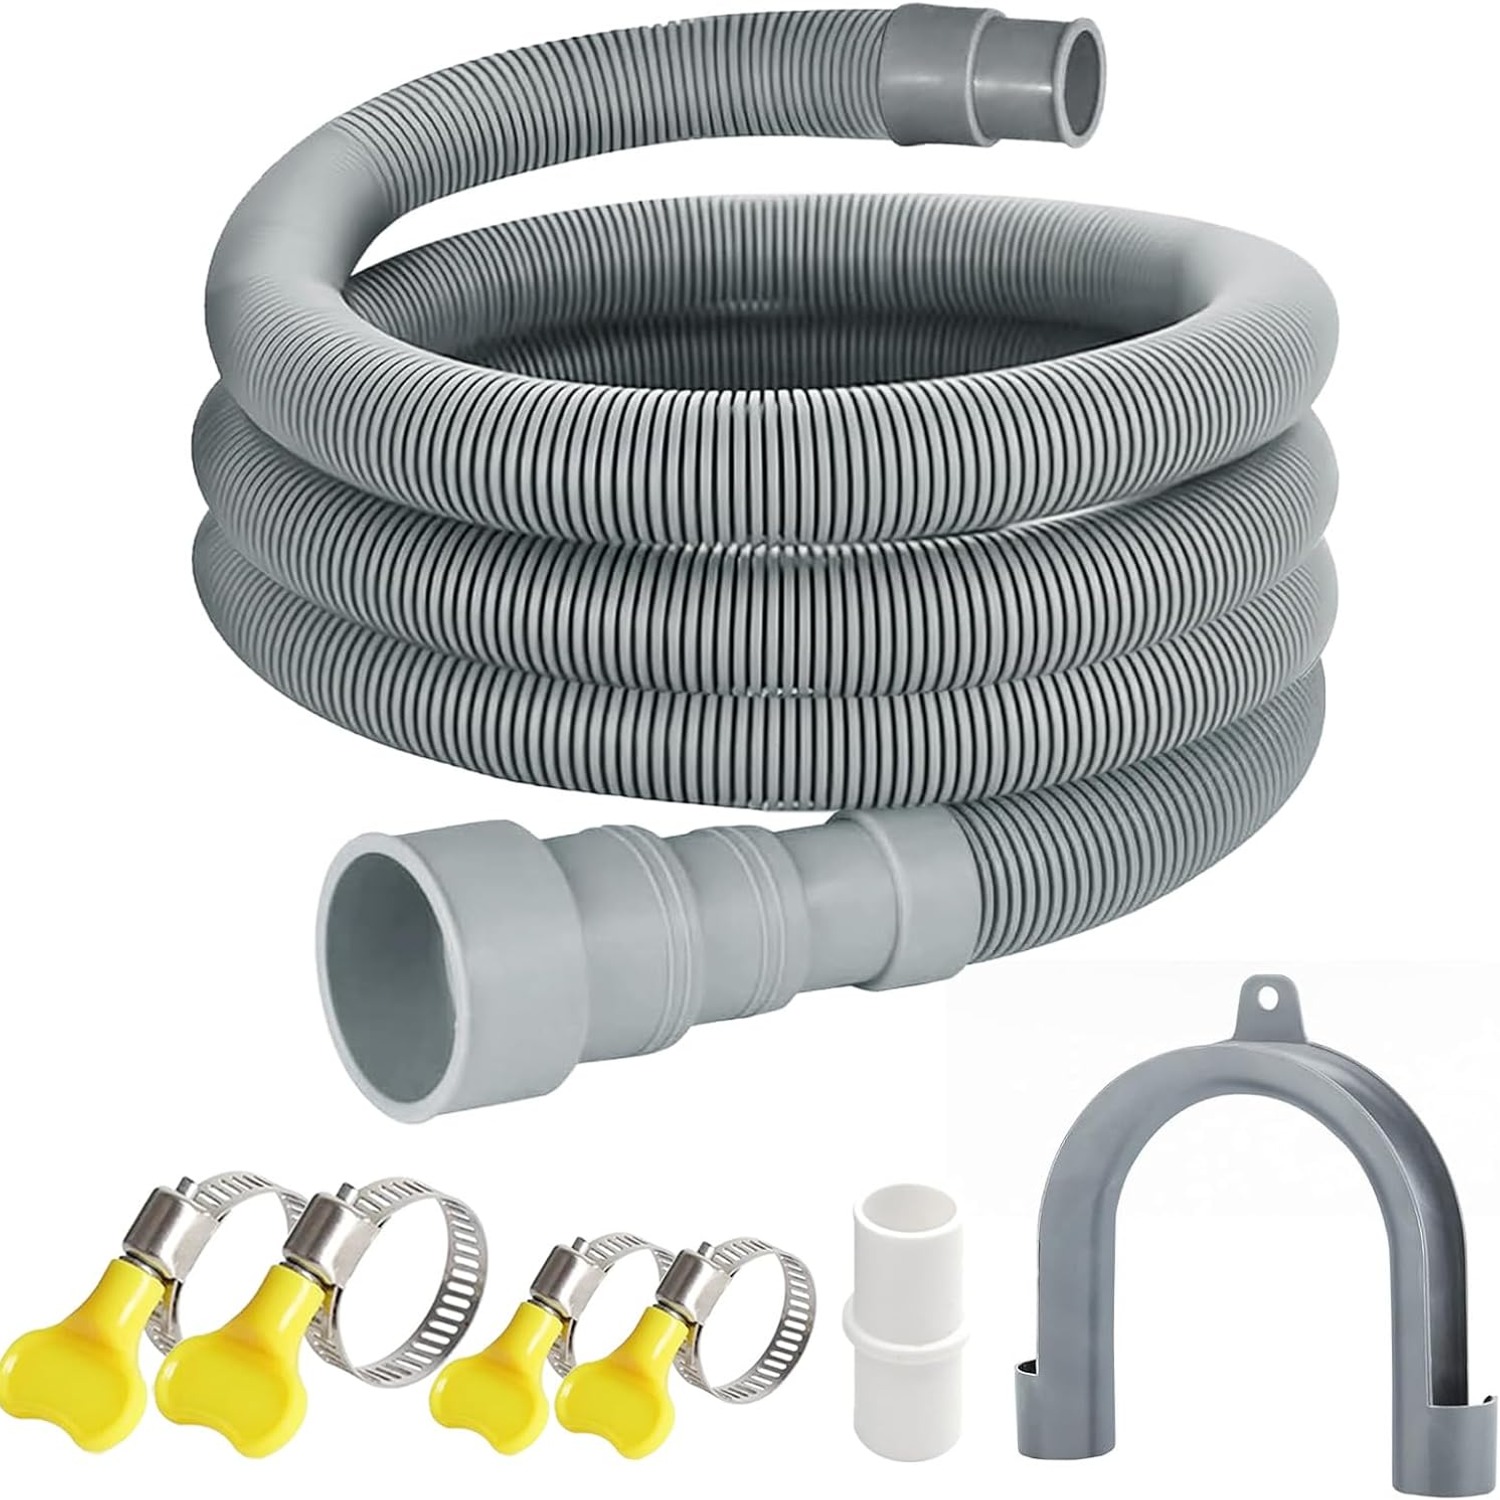
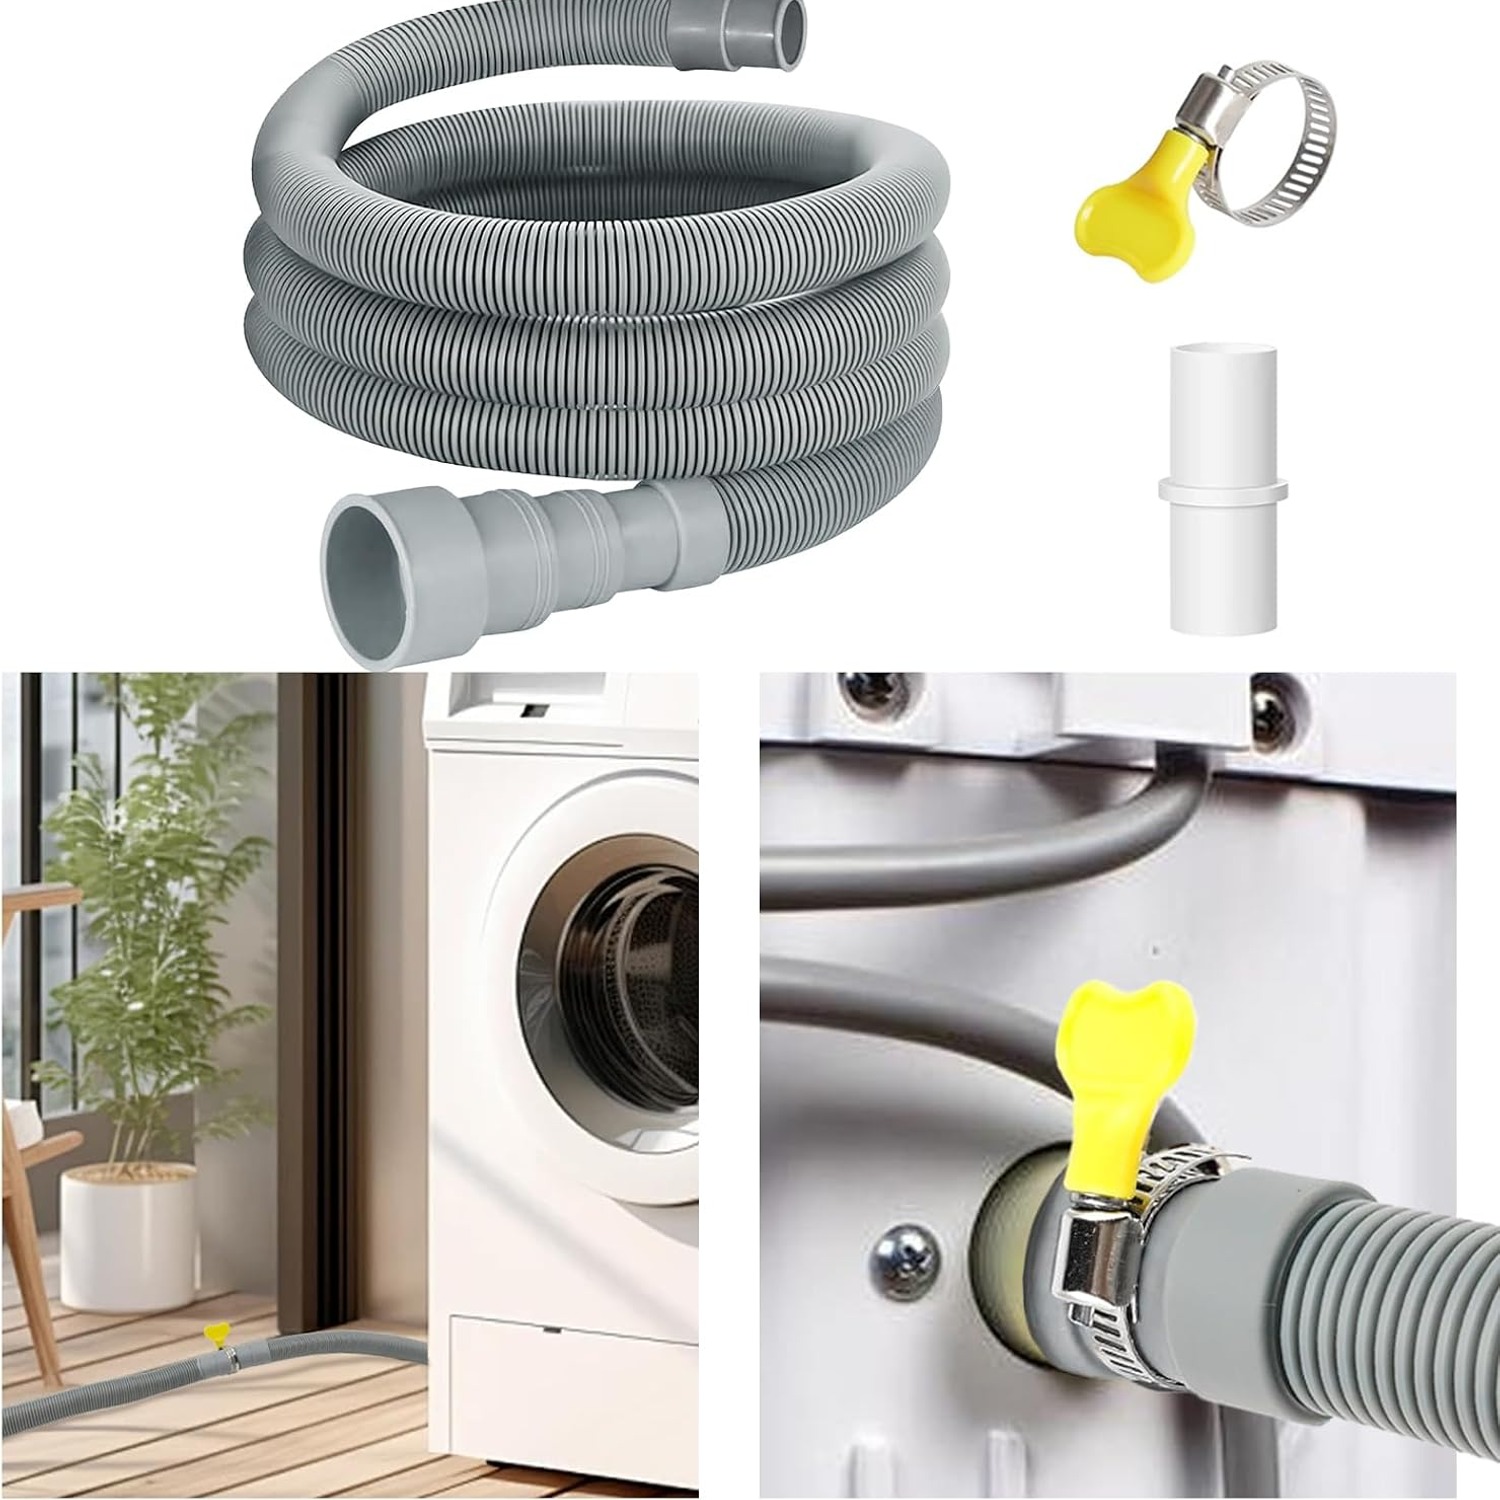
This is a 6.5 foot flexible discharge hose made from polypropylene, with a corrugated, thick-walled body and an outside diameter of 0.95 inches. It arrives with one adapter, four heavy-duty clamps and a U-bend drainage holder.
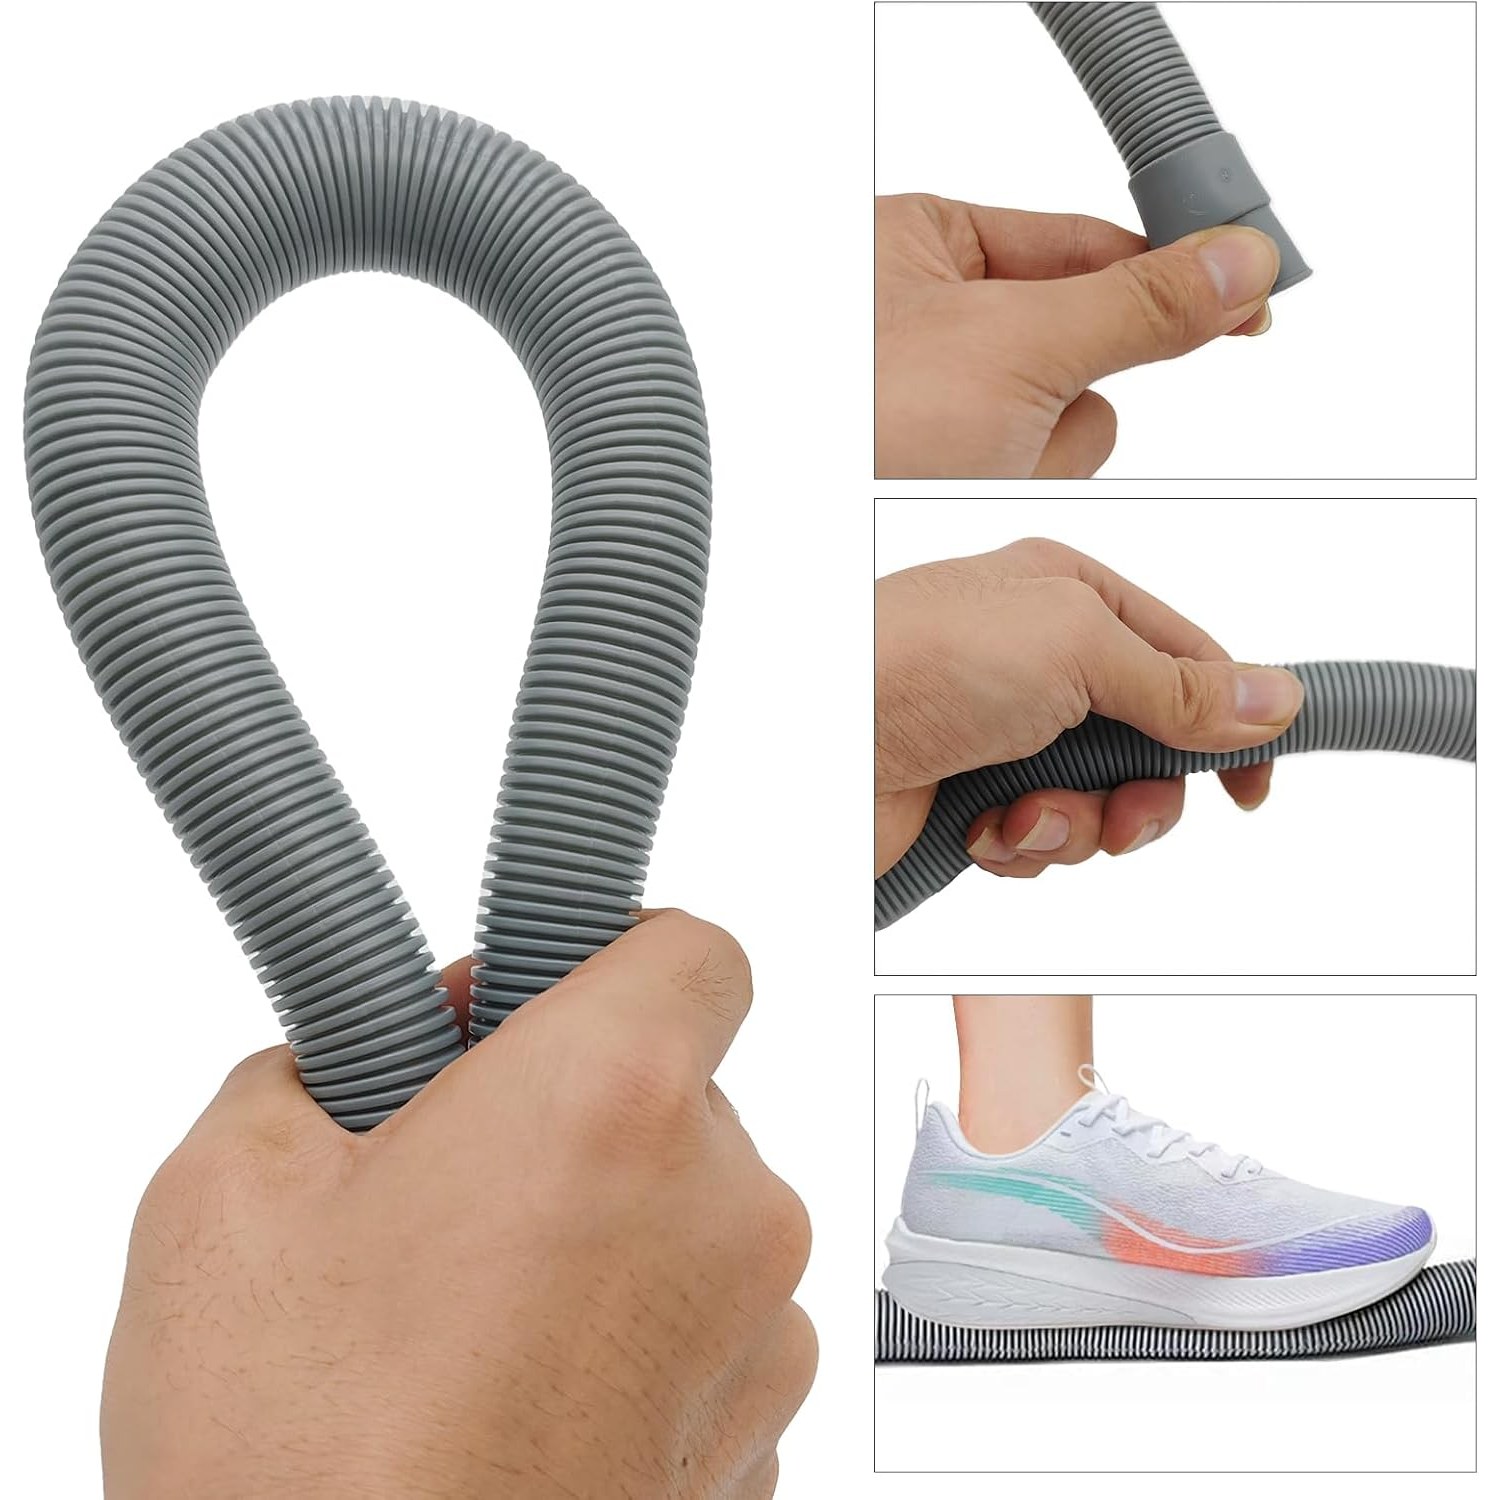
The corrugation is the point. A smooth-walled tube bent around a corner tends to collapse at the bend, and once the bore narrows the water slows down. Ribs let the wall fold on itself as it curves, keeping the inside open. The thickness is what gives the hose its memory, so when a heavy machine leans on it for a week, it comes back round instead of staying flat.
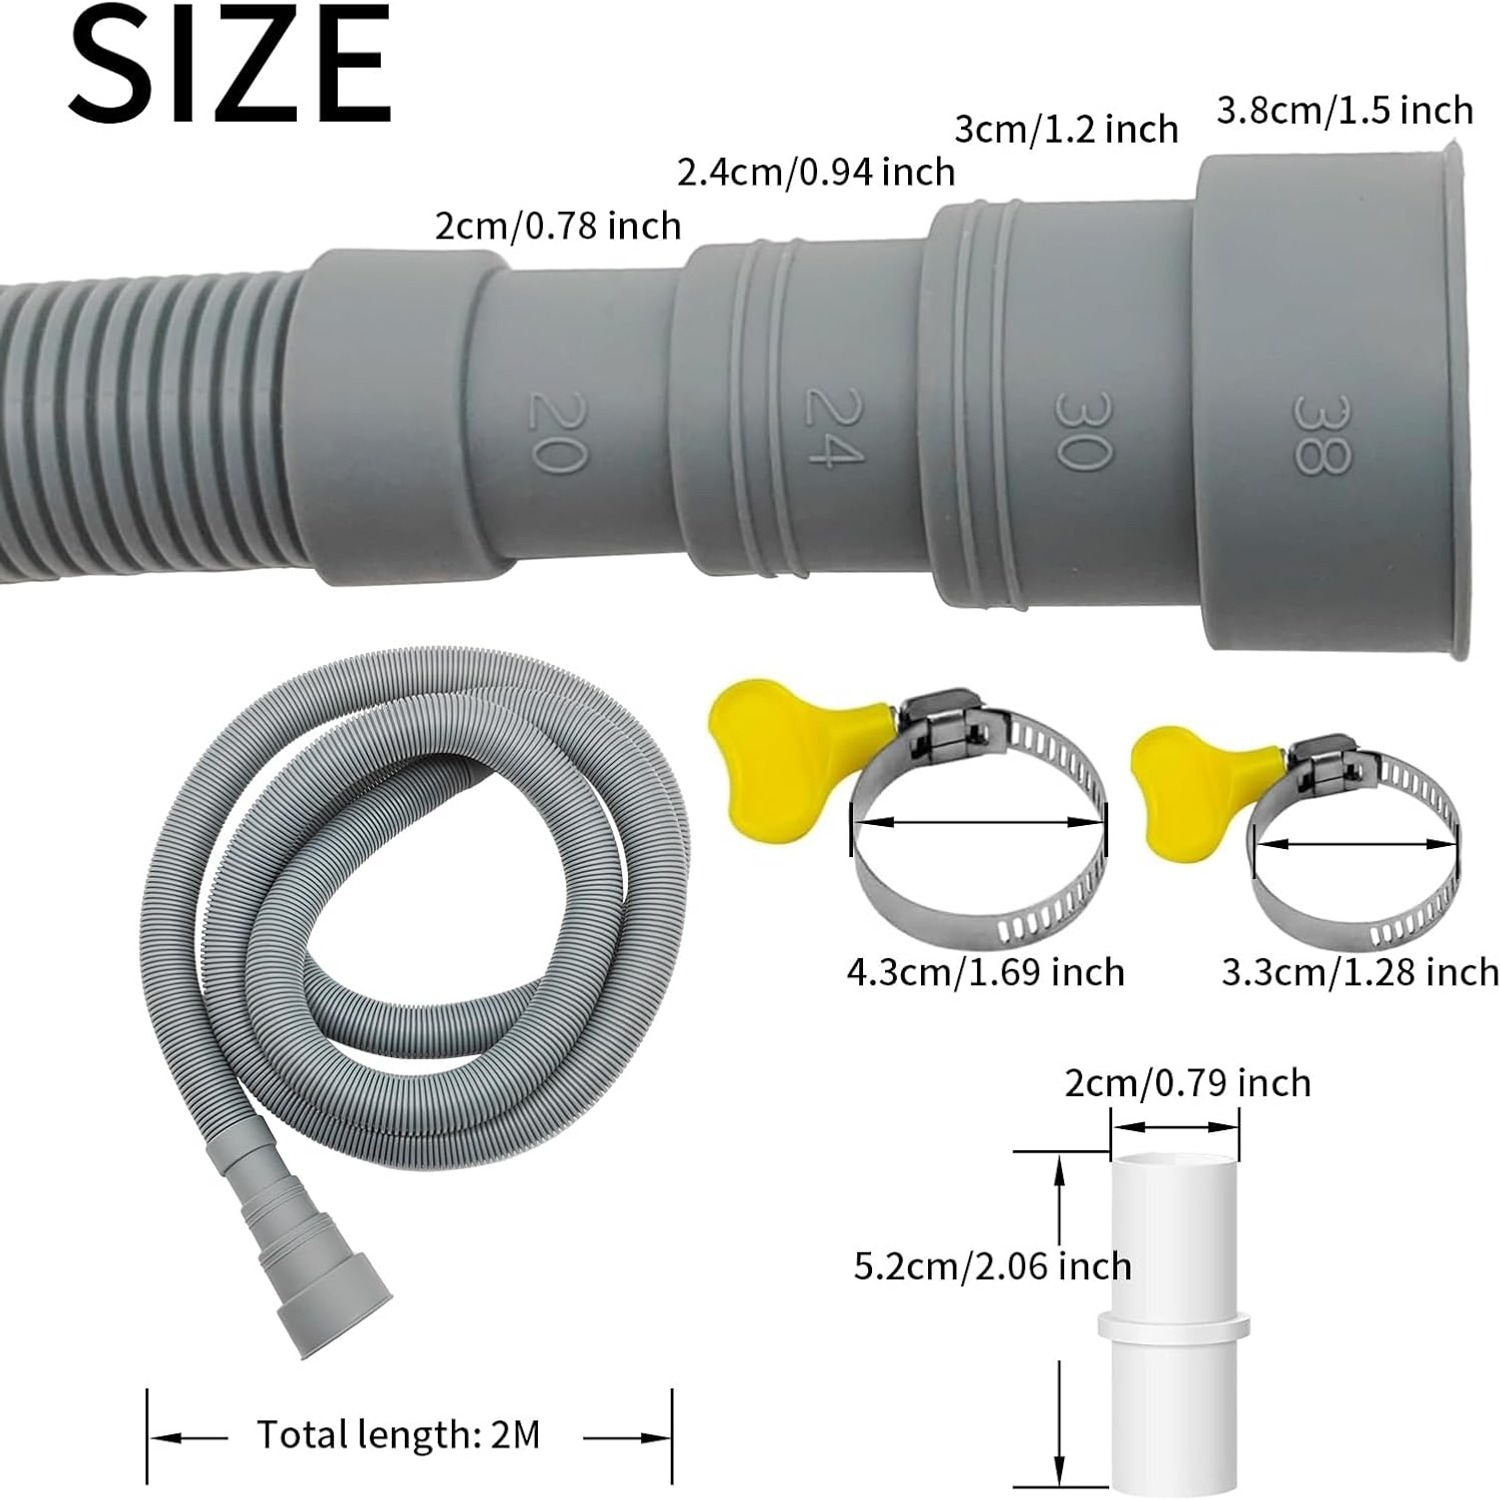
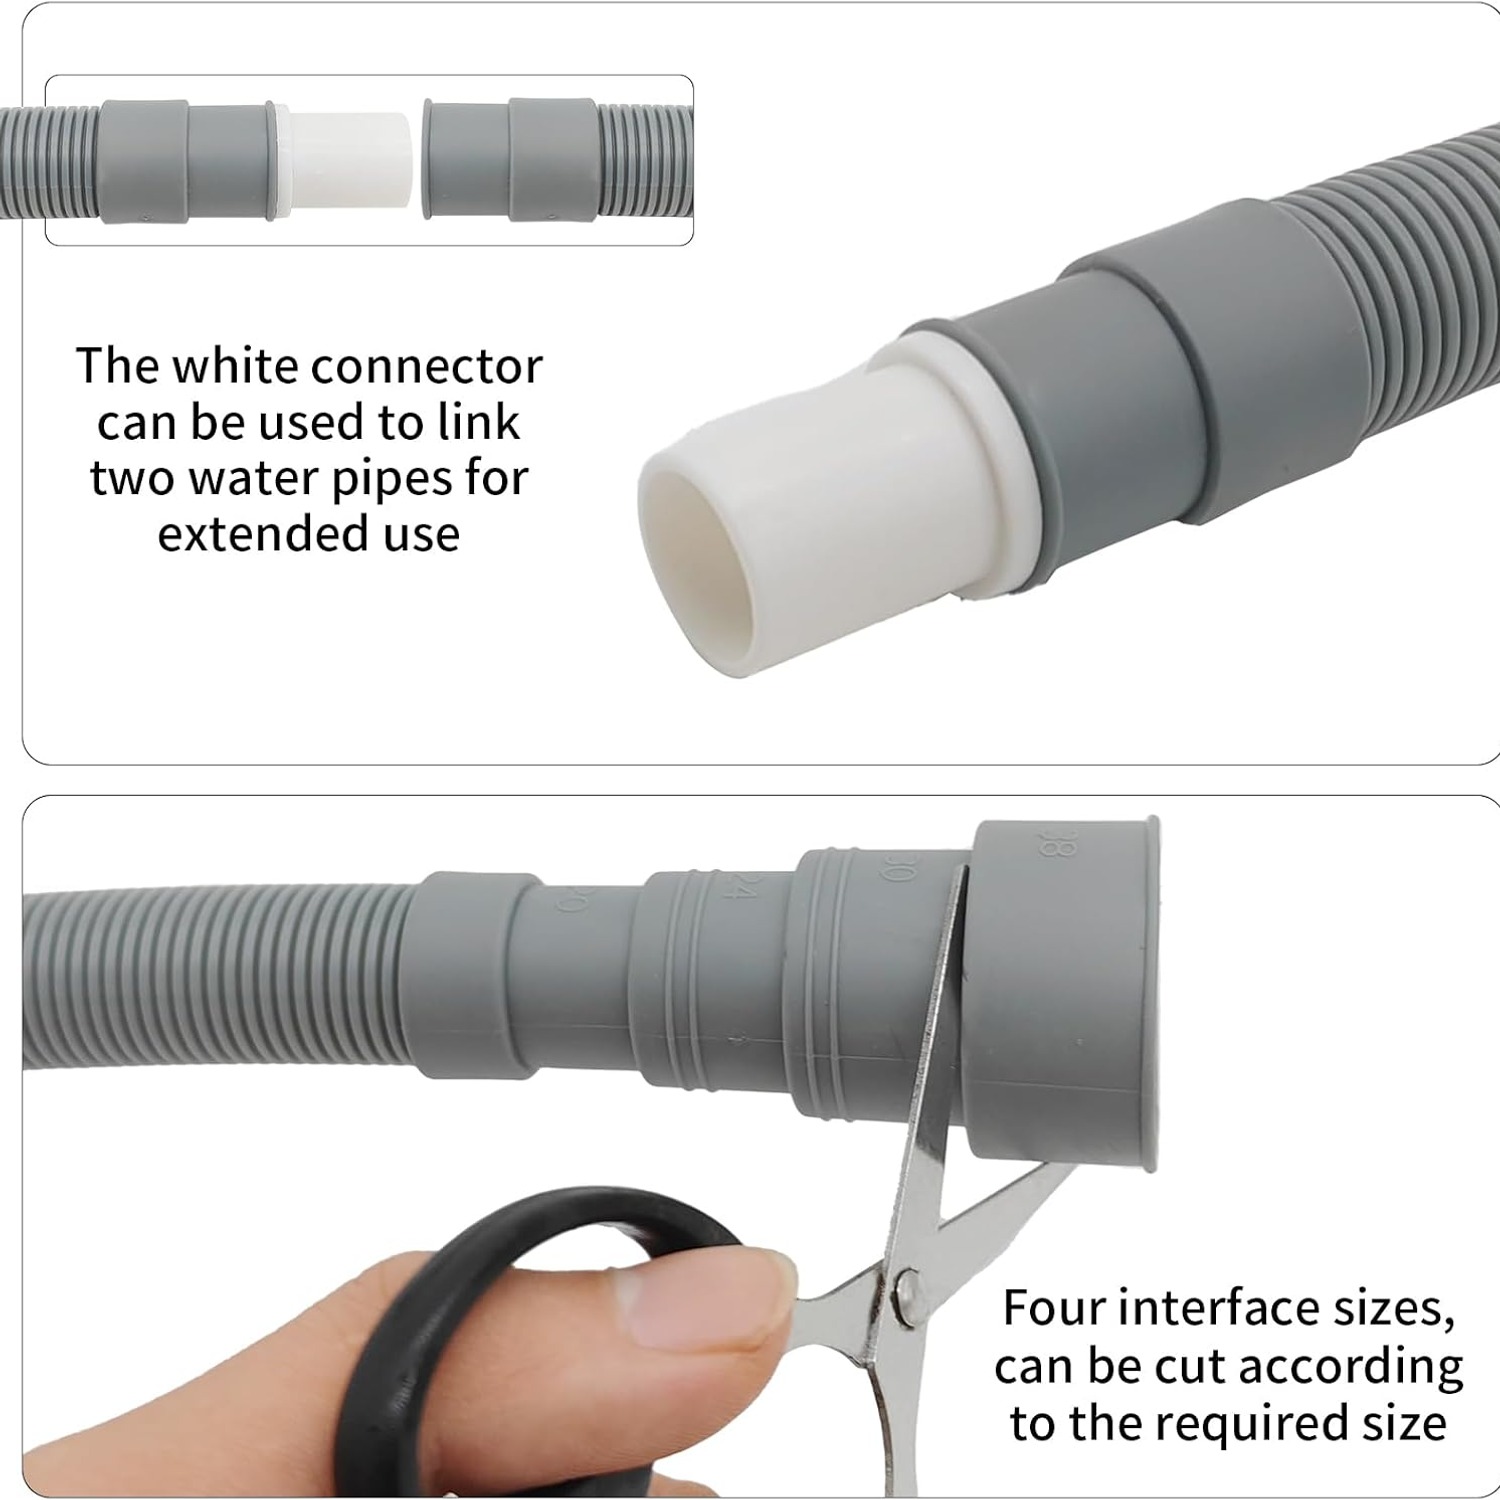
The other practical feature is the stepped connection head. Instead of one fixed size that may or may not match your washer, the end is moulded in four marked steps at 0.78, 0.94, 1.2 and 1.5 inches, which is roughly 20, 24, 30 and 38 mm. You cut back to the step that matches your outlet. That turns a guessing game into a measurement.
Measuring before you buy
Pull the machine out far enough to see the back panel. The drain outlet is usually a short plastic spigot low on the back or side, often with a ridge or barb on it. Measure across the outside of that spigot, not the inside.
If the figure sits anywhere between 0.78 and 1.5 inches, this hose will suit. If it is smaller or larger than that range, look for something else, because forcing a bad fit is how you create the leak you were trying to prevent.
While you are back there, measure the distance from the outlet to where the water needs to go. Then add roughly two feet. You want enough slack to pull the machine clear of the wall without unhooking anything, plus a gentle curve at the back rather than a tight corner. If the total comes in well under 6.5 feet, that is fine, the body can be trimmed. It is far easier to shorten a hose than to find another foot of it at ten o'clock on a Sunday.
Fitting it without drama
Turn the machine off at the outlet and have a towel and a shallow tray ready. The old hose holds water, and it will find your socks.
Pull the old hose off, loosening its clamp first. If the fitting has hardened onto the spigot, a careful twist usually breaks it free. Resist the urge to lever it off with a screwdriver, since a scratched spigot never seals well again.
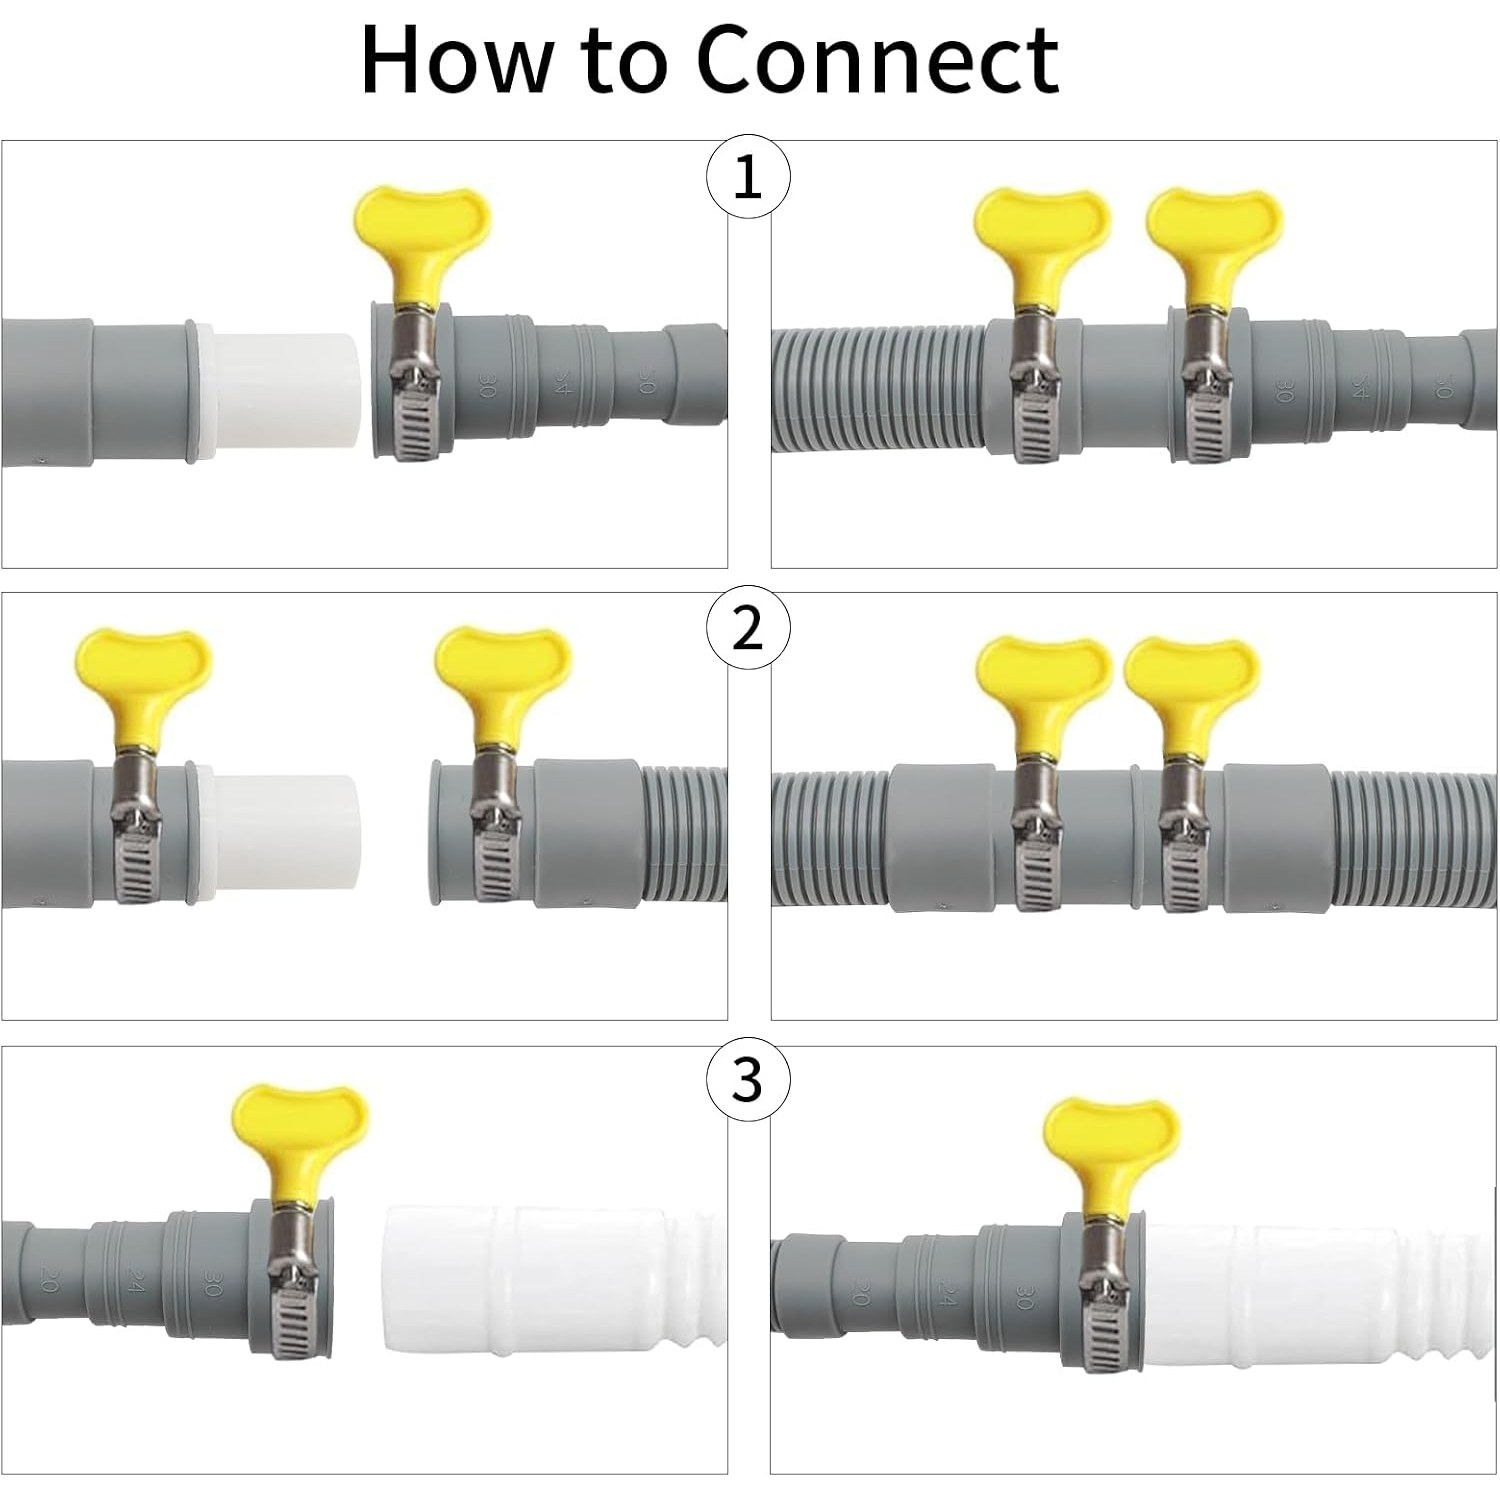
Cut the new head to size on the ring, not between rings, with a sharp utility knife. A square cut seats evenly and a ragged one does not. Push the trimmed head fully onto the spigot until it bottoms out, then fit a clamp over the joint and tighten it until the hose will not twist by hand. Snug, not crushed. If the clamp is biting a visible groove into the plastic, back it off.
Run the hose to the drain with a lazy curve. Fit the U-bend holder to the discharge end so the hose keeps a hook shape and sits securely over the rim of the standpipe or laundry sink. That curve is doing two jobs, holding the hose in place and helping stop water siphoning back out of the drum.
Then run a short cycle and watch. Check the machine end, check the discharge end, and feel along the hose for damp patches. Check the clamp again after that first cycle, because hoses settle.
One rule worth repeating. Fitting a flexible hose to an appliance outlet is a homeowner job. Cutting, moving or joining fixed pipework in the wall is not, and that part belongs to a licensed plumber.
Where else it gets used
A hose like this does not only serve washing machines. The same trim-to-fit approach makes it a common choice for dishwasher discharge, laundry sink runs, tub drains and air conditioner condensate lines. Anywhere waste water needs to travel a short distance along a flexible path, this is the sort of part that does it.
Two things matter whatever the application. Keep a downward slope so water does not sit in a low spot, and keep the number of joints low. Every joint is a place for a leak to begin. The supplied adapter handles joining work when you genuinely need it, but a single continuous run beats two joined lengths every time.
Looking after it
Flexible hoses fail in predictable ways, which means you can see most of it coming.
Flush the hose through with clean water occasionally, particularly if you wash a lot of towels or pet bedding and the lint filter is working hard. Wipe the outside with a damp cloth and a little mild soap, then dry it. Skip chemical drain cleaners, since they are hard on plastic and on whatever sits downstream.
Give the hose a quick look every few months. You are checking for splits along the ribs, soft or discoloured patches, and clamps that have worked loose. A hose that weeps slightly at a joint is telling you something, and it is cheaper to listen now than to replace a floor later.
If you store a spare, coil it loosely. Folding one flat and stacking boxes on top of it for a year will leave a crease the hose never fully forgets. Keep it away from heaters and anywhere sharp.
Who this suits
It suits anyone replacing a tired hose, anyone whose machine sits further from the drain than the factory hose allows, and anyone setting up a portable washer that gets hooked up and put away again. It also suits renters, since it is a quick change that leaves no mark and can be swapped back when you move.
It is less suitable if your outlet sits outside the 0.78 to 1.5 inch range, or if what you actually need is a new standpipe rather than a longer hose. If the drain opening is in the wrong place, a longer hose is a workaround and not a fix.
The short version
A 6.5 foot corrugated polypropylene hose with four cut-to-fit connection sizes, supplied with an adapter, four clamps and a U-bend holder. Measure your washer outlet, trim the head to the matching step, clamp it snug, hook the end properly and run a test cycle. It is a twenty minute job that quietly prevents a very bad afternoon.